PlayStation 4 has given us some of the most visually stunning games of this generation – whether it’s the rich, western landscape of Red Dead Redemption 2 or the vibrant, fantastical world of Spider-Man. However, what’s the point of these gorgeous graphics if your console is outputting them with bad graphics?
If your PS4 has bad graphics and you want to fix it, you can – manually set the resolution, change the HDR settings, change the RGB Range, check the option for High Contrast, and lastly, consider upgrading to a PS4 Pro.
In this article, we’ll show you how to properly configure each of these settings so that you can get the best graphics on your PS4. As a fun bonus, we’ll also include a list of our favorite, must-play PS4 games that will show off your console’s newly-improved graphics! Let’s get started.
Steps To Fix Bad Graphics on PS4
Here’s a detailed breakdown of each step you need to take in order to fix bad graphics on your PS4.
1. Manually Set the Resolution
As you might know, resolution is the number of pixels that are displayed on your screen. The higher the resolution, the sharper and clearer the image will be. So, if your PS4 is outputting lower than optimal resolutions, it stands to reason that the graphics will look bad.
In most PS4s, the resolution will be set to ‘Automatic’. This means that the console will automatically select the best resolution for your TV.
Although this works in most scenarios, sometimes the PS4 will select a lower resolution than what your TV is capable of. If this is the case, you’ll need to manually set the resolution.
Here’s how to manually set the resolution:
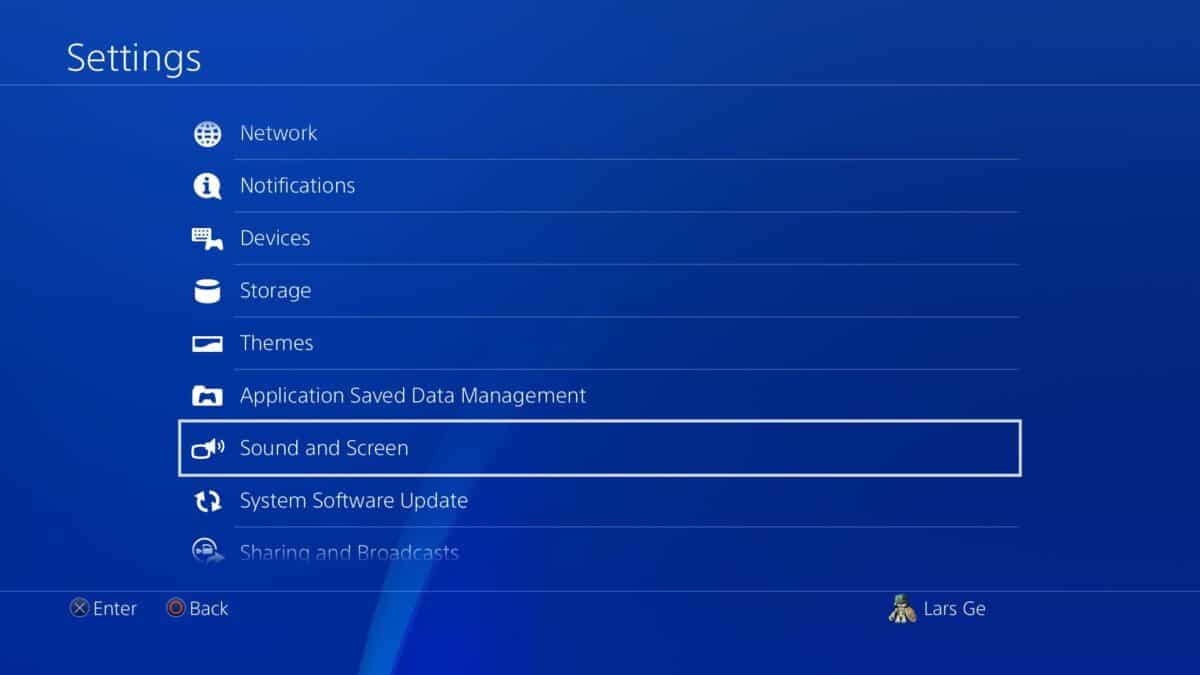
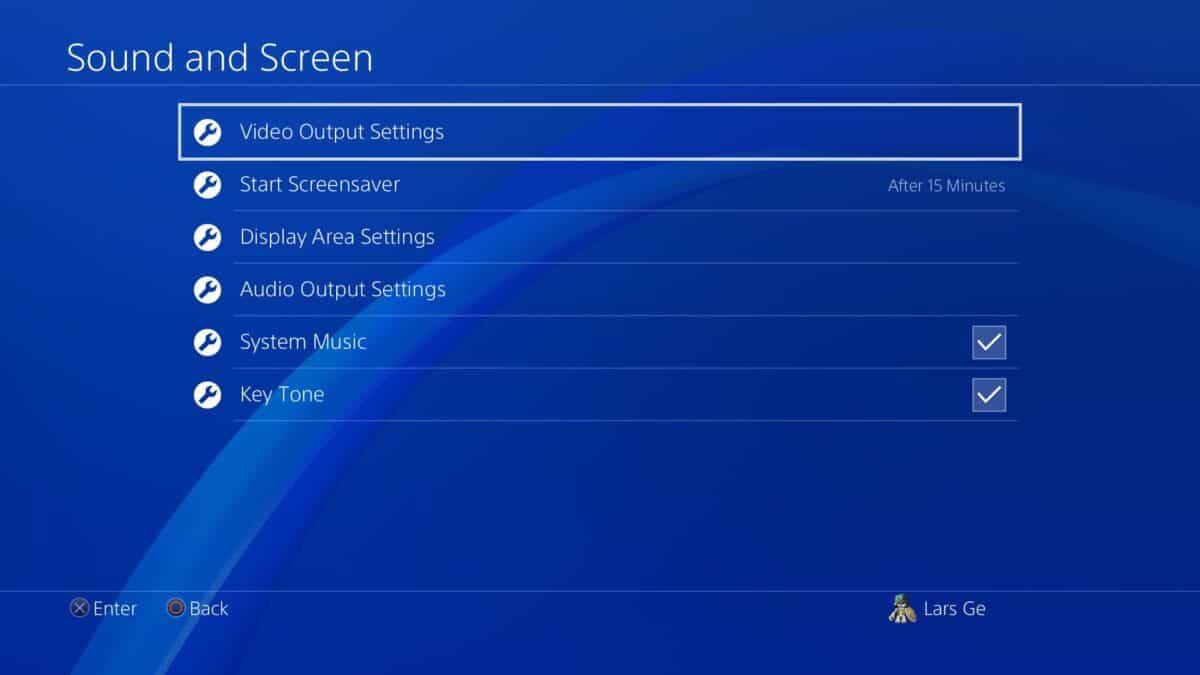
- Go to ‘Settings’ > ‘Sound and Screen’ > ‘Video Output Settings’
- Under ‘Resolution’, select ‘1080p’.
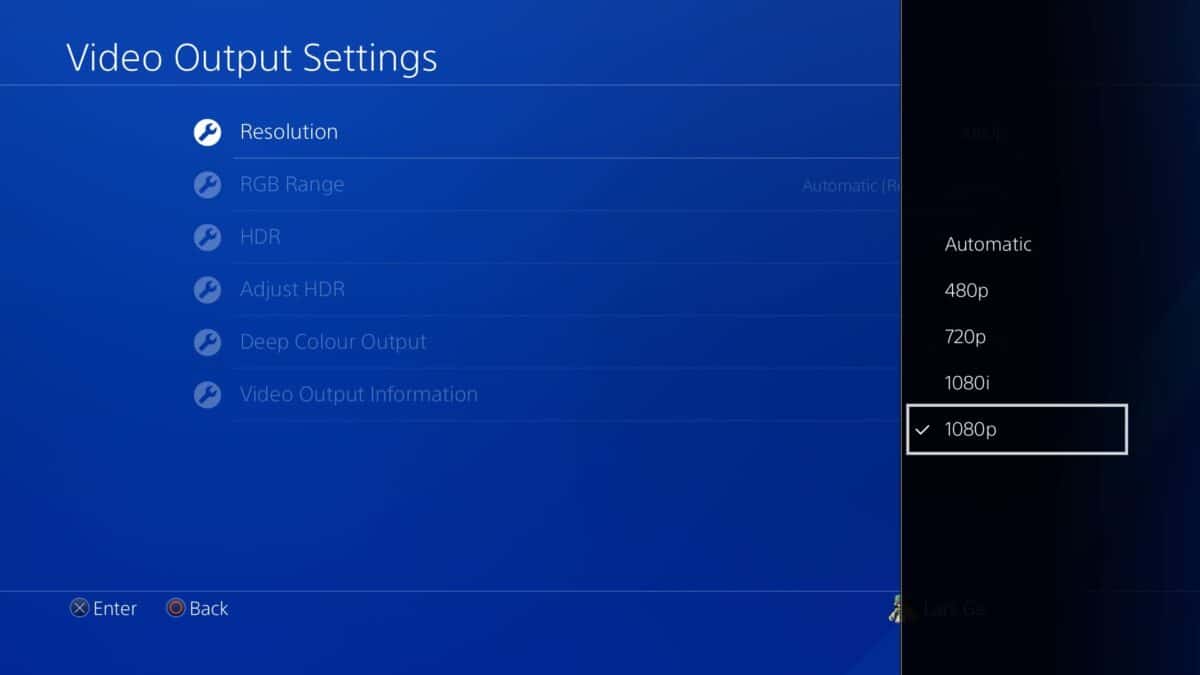
This will force the PS4 to output at 1080p, which is the highest resolution that most TVs can handle. If your TV is capable of displaying even higher resolutions, you can adjust accordingly.
2. Change the HDR Settings
HDR stands for High Dynamic Range, and it’s a feature that can vastly enhance the visuals of your games and bring colors to life like never before.
If your PS4 has bad graphics, one of the first things you should do is check the HDR settings. It should be set to ‘Automatic’ by default, but in case it’s not, here’s how to change it:
- Go to ‘Settings’ > ‘Sound and Screen’ > ‘Video Output Settings’
- Under ‘HDR’, select ‘Automatic’.
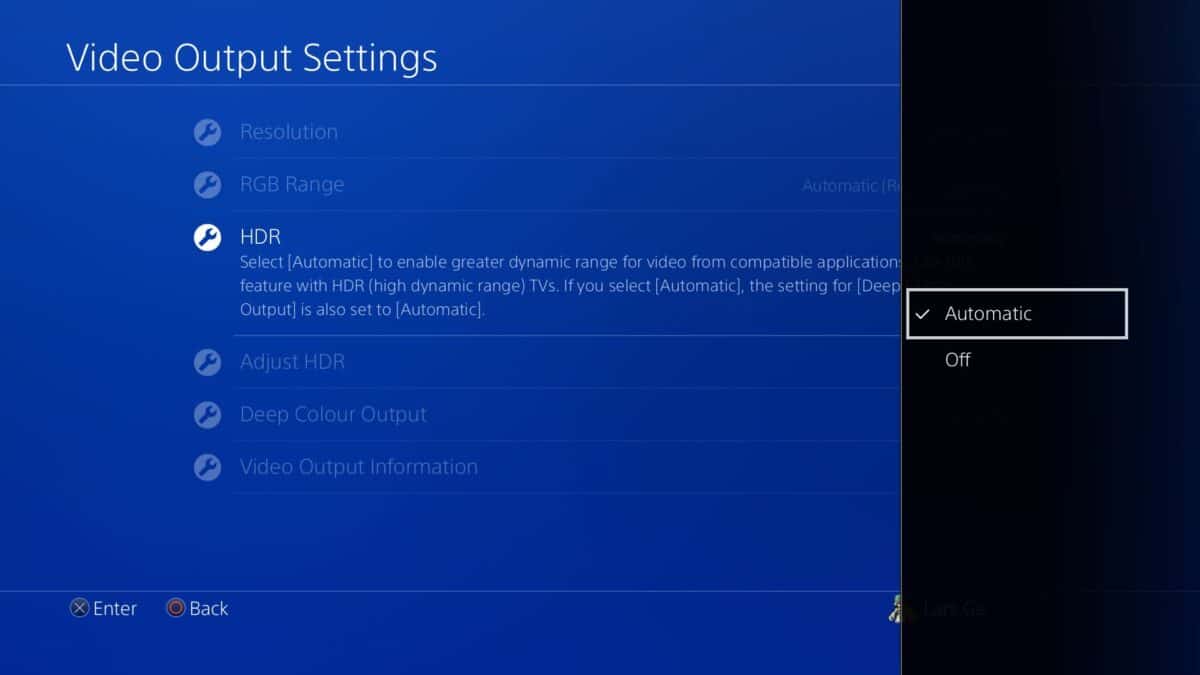
This will ensure that your PS games are taking advantage of HDR (if they support it), and will thus look much better.
Note: You can also select the option for ‘Adjust HDR’ in this menu, which will run a test to properly calibrate the HDR settings for your TV.
3. Change the RGB Range
The RGB Range is basically the range of colors that your TV is able to display.
If this is set to a lower range, you’ll notice that the colors in your games will look muted and washed out. So, if you want to fix bad graphics on your PS, one of the first things you need to do is change the RGB Range.
- Go to ‘Settings’ > ‘Sound and Screen’ > ‘Video Output Settings’
- Under ‘RGB Range’, select ‘Full’.
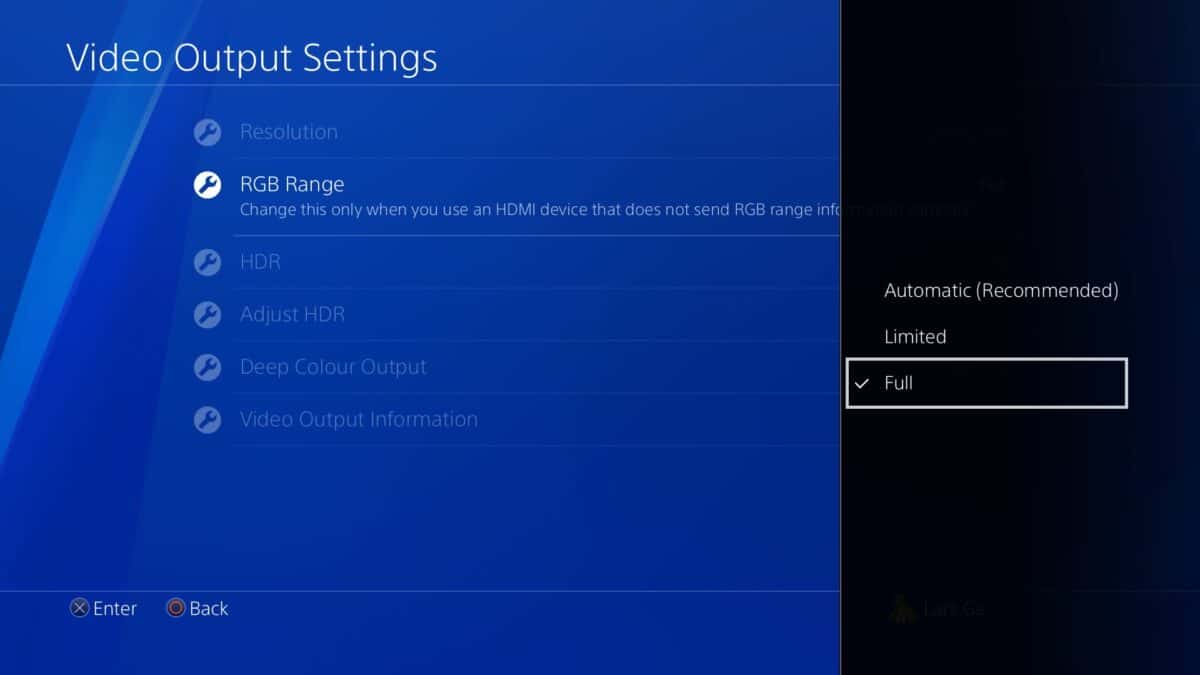
This will allow your PS4 to take advantage of the full range of colors that your TV is capable of displaying, which will result in much better graphics.
Important:
Remember, setting the RGB range to ‘Full’ will mean that all your blacks will look really deep. This is okay if you’re using a monitor, but in case you’re using a TV, there are chances that this can cause ‘crushing’ – where the dark areas of games become completely black and you can’t see anything.
To resolve this, you should set the black levels on your TV settings to either ‘High’ or ‘Normal’.
4. Check the Option For ‘High Contrast’
‘High Contrast’ is an option in PS4 that adjusts the colors of text and backgrounds to improve the clarity of things that you see on the screen. It really makes a world of difference, especially in story-driven games that have a lot of text.
Here’s how to turn high contrast on:
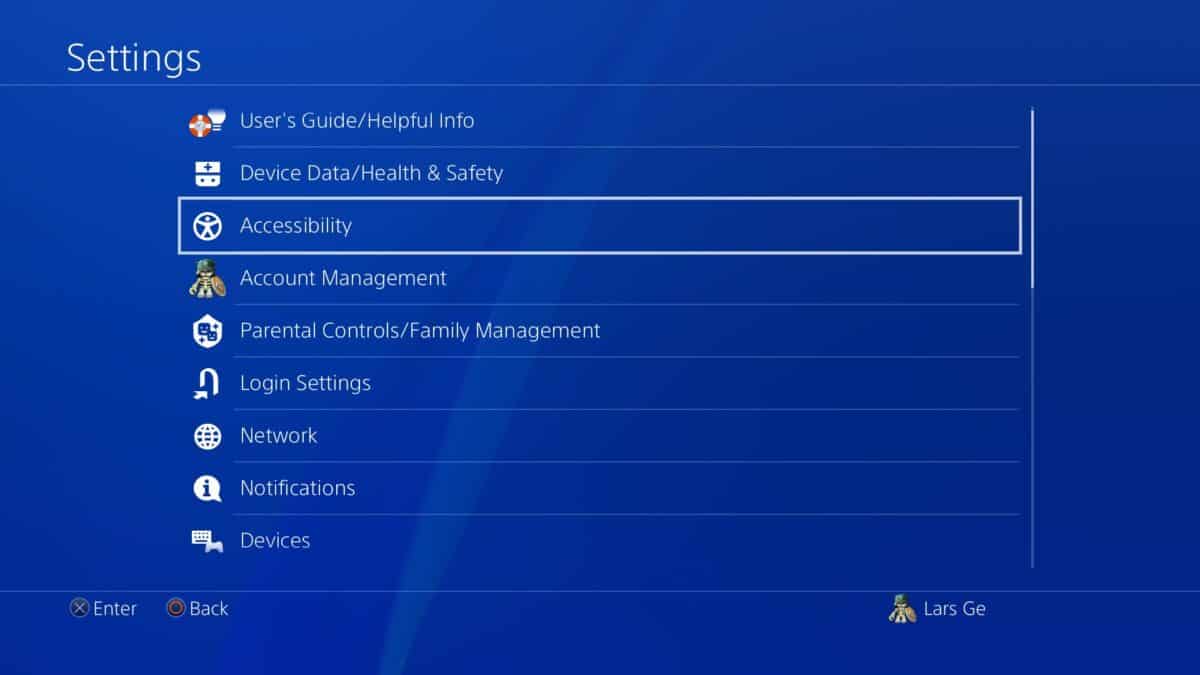
- Go to ‘Settings’ > ‘Accessibility’
- Find the option for ‘High Contrast’ and select it to tick the box.
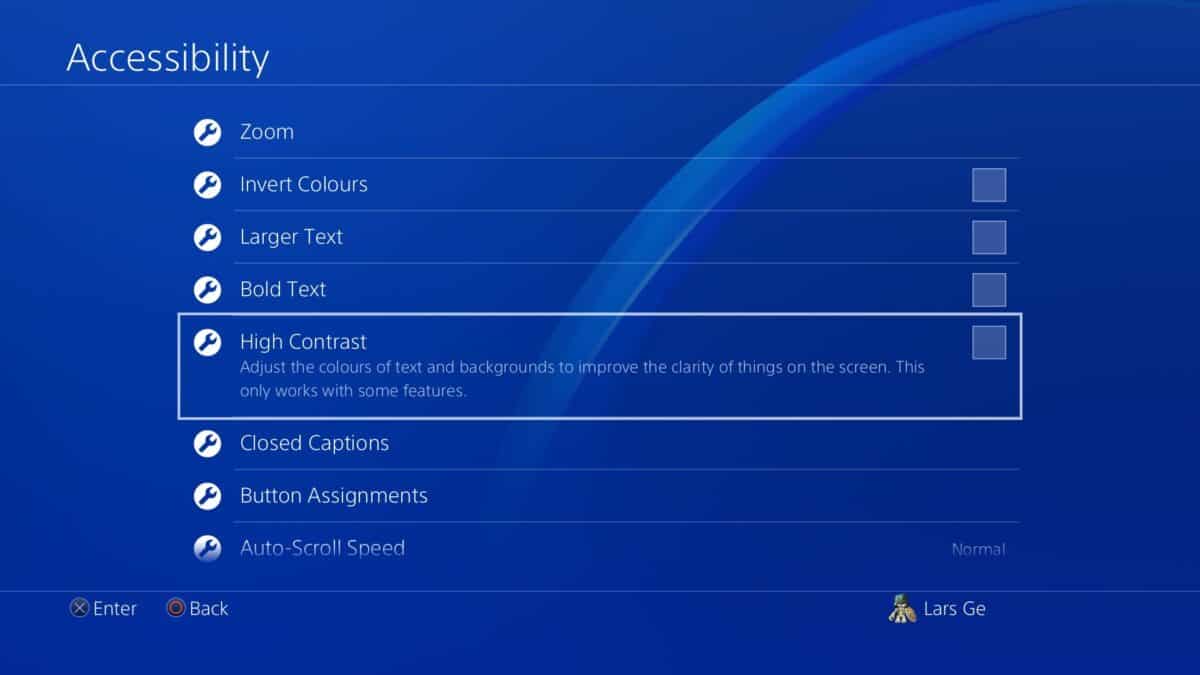
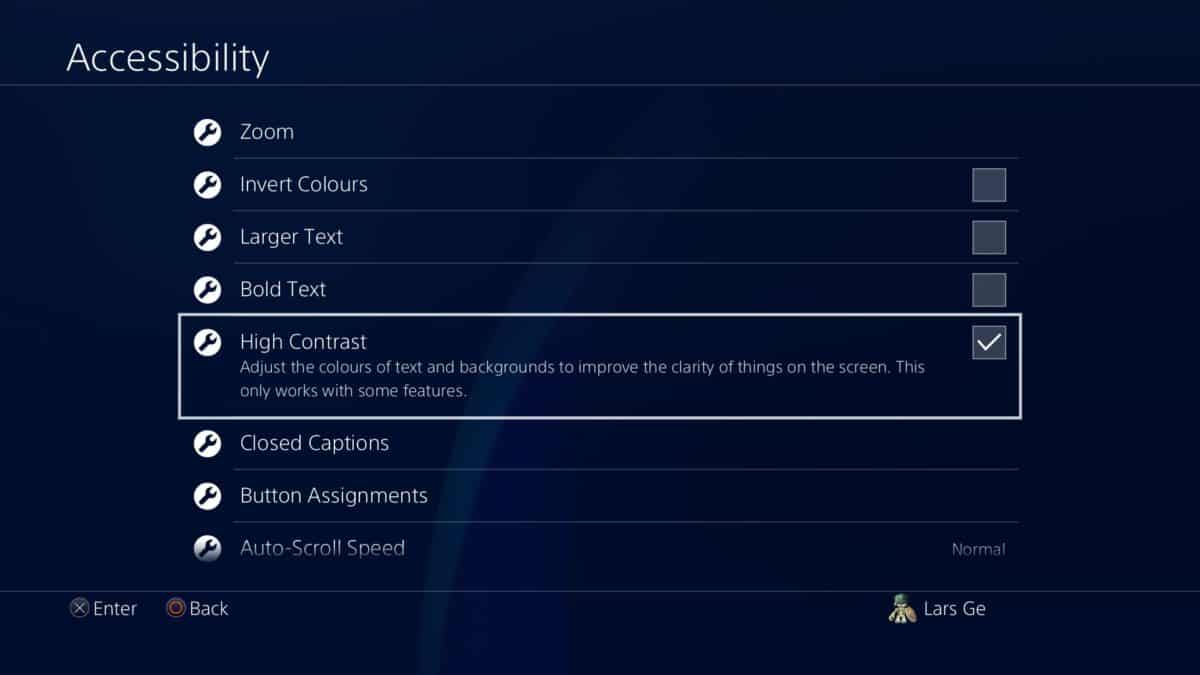
You should immediately see a difference in the clarity of the text and menus on your screen.
5. Consider Upgrading to A PS4 Pro
Now we realize that this might not be an option for everyone, but trust us when we say, the PS4 Pro is a significant upgrade over the base PS4 model. It comes with some of the best graphics that you can get on a console.
Take a look at some of the key differences between the two:
| Standard PS4 | PS4 Pro | |
| Resolution | Full HD 1080p | 2160p – 4K |
| Appearance | Slimmer, with two layers. Dimensions – 275.1 x 305.1 x 53.1 mm | Thicker, with 3 layers. Dimensions – 295 x 327 x 55 mm |
| CPU | 1.6GHz 8-core AMD Jaguar | 2.1GHz 8-core AMD Jaguar |
| GPU | 1.84 TFLOP AMD Radeon | 4.2 TFLOP AMD Radeon (Over twice as powerful as the standard version, to support the 4K functionality) |
| Storage | 500GB | 1TB |
| Other Features | Nil | Boost Mode for increased performance, faster frame rates, enhanced Wifi. |
| Price | $299 | $399 |
As you can clearly see, the PS4 Pro is leaps and bounds ahead of the standard PS4 model, and it’s sure to give you the best possible gaming experience. So if graphics is your main concern, we would highly recommend that you upgrade to a PS4 Pro.
Note: The 4K capabilities and advanced graphics of the PS4 Pro is only useful if you have a 4K supported TV. If you don’t, then there’s not much point in spending the extra money on the Pro model.
List Of PS4 Games with The Most Beautiful Graphics
Now that we’ve gone over some ways to improve the graphics on your PS4, let’s take a look at some of the most beautiful games that you can play (especially now that you’ve optimized your console graphics!).
- Assassin’s Creed Odyssey
- Bioshock Infinite
- Days Gone
- Death Stranding
- Ghost Of Tsushima
- God Of War
- Horizon Zero Dawn
- Journey
- Red Dead Redemption 2
- Spiderman
- The Last Guardian
- The Last Of Us Part II
- The Outer Worlds
- Uncharted 4: A Thief’s End
- Witcher 3
Frequently Asked Questions (FAQs)
Here are some of the most commonly asked questions that we get about PS4 graphics and how to fix them.
Q.1. Will lowering the resolution of my PS4 improve the performance?
A. No, lowering the resolution will not improve the performance of your PS4. This is because most consoles have a locked internal render resolution, which remains the same regardless of whether you change the output resolution.
Q.2. What is the difference between PS4 and PS4 Slim?
A. Although both the PS4 and PS4 Slim have the same specifications, the difference is that the latter is slimmer and more compact – almost 30% smaller, in fact! In terms of graphics and performance, there is no difference.
Q.3. Can I change my PS4 graphics card?
A. No, you will not be able to change the graphics card on your PS4 as it is integrated directly into the motherboard. The only thing that you can change is the HDD or SSD.
Final Thoughts
Now that you know exactly how to fix the graphics on your PS4, what are you waiting for? There are whole new worlds out there for you to explore and exciting adventures to be had (all in stunningly beautiful graphics, of course!). So go ahead and get started on optimizing your PS4 console today!
